Author Archives: ForToffee

7 Seg for Raspberry Pi

A while back I saw a project on IndieGoGo by a teenager, Tom Garry.  The project was called 7 Seg for Raspberry Pi.  Having never backed anything like this I thought I’d give it a try, at £10 it’s not a lot to loose.

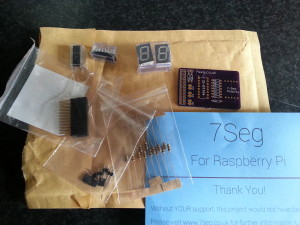
Fast forward about 6 weeks (5th May for those of you who care) and a brown jiffy bag landed on my door mat.  I love brown jiffy bags as they usually contain goodies!  This one did not disappoint.

7Seg of Raspberry Pi delivery


So what did I get for my £10

  • A well produced purple PCB
  • Several bags of components – a nice touch was extra resistors of each value
  • Two 7seg displays; one red the other green.  This is so you can choose your colour
  • A warm fuzzy feeling 🙂

When I eventually got round to soldering it up it was quite straight forward, it is also well documented on the 7seg.co.uk website.  Another week later I managed to find some time to test it!  Thankfully I managed to solder everything in the right places and it worked first time.

I ran a test python program using the Simple Counter example from the website.  I augmented it to count down as well as up by referencing pin 11 of the GPIO which controls the decrement function.  In the quick video below I repeated the for loop changing the upPin variable to downPin which references pin 11.

The build and the packaging are great but (sorry Tom, there’s a but), it’s a limited function device; i.e. it can only count from 0 to 9 and back again (unless I’ve missed something?).  The device has three jumpers that are closed (i.e. connected) and these relate to the reset count up and count down pins on the GPIO.  I suspect this has been done to allow leads to be attached to different pins on the header should the user wish to change the numbering.  The one I haven’t figured out yet is the open jumper at the top as I can’t seem to find any tracks leading to/from them.  However, I have yet to unpack the multimeter and go a hunting. [UPDATE: Tom pointed me at the schematic here]

If this were to go to a Rev 2 I would like to see the Borrow and Carry function made available from the 40110 chip. This could allow either feedback into the Pi via further GPIO pins or allow the daisy chaining of two or more boards

All in all it’s a tidy little add-on board which looks the part.  Top job Tom!

2nd Raspberry Jamboree – After Show Party

After the (semi) serious business of workshops, talks and panel sessions was over and the various exhibitors started had started breaking down their stands it was party time!  The Jamboree coincided with the Raspberry Pi’s 2nd birthday.  OK, technically that’s on the 29th Feb but why let that ruin a good excuse for a party?!

In the run up to the Jam Lisa “@elsie_m_” Mather had offered to help organise some of the after show party.  In true Alan “@teknoteacher” O’Donohoe style, this ended up being Lisa organising the whole shabang…. and an wonderful job she did too!

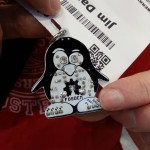
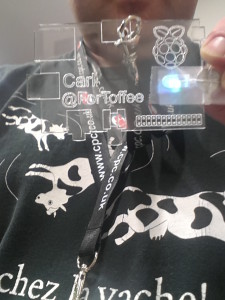
Name Badge

Pre Party Party

Well, less of a “party” more of a “working party” was formed from those willing, and those walking past, to get the room sorted in the hour we had between talks and the party start time.  With frenetic pace name badges were constructed, tables laid, swag bags filled, freebie Rubiks cubes distributed and Pi themed side shows were put together.


Awards, Cakes and Games

At 5pm the unwashed masses were let into the room with Alan O’D compering like we were a Yr 7 & 8 assembly and Lisa hooning round the place like her life depended on it.

There were games

…and Snake

There were awards (huge round of applause for Amy)

and there was prize winning cake!

2nd Raspberry Jamboree – Manchester 27-28th February 2014

The alarm sounded at 5:20 on Thursday morning; a 4 hour train journey to Manchester Picadilly awaited.  Still, time for a shower and a coffee 🙂

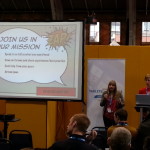
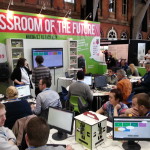
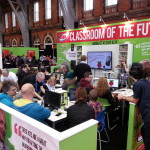
After a reminder of why I don’t commute to London for work, I arrived at the Manchester Exhibition Centre just before 11; ready for the PiCam and Python workshop. I bought a camera a few weeks ago but hadn’t done much with it, this was my opportunity to learn the basics so I could play properly later. The most rewarding thing for me was helping the four teachers that were on my table, all of them with little to no exposure to the Pi. By the end of the session we’d taken our mugshots (or the table when the camera fell off) using the GPIO to control image and some simple video capture like a very basic digital camera. More info on the camera and Python can be found at http://picamera.readthedocs.org/ the lesson plans we used are at https://github.com/raspberrypilearning/python-picamera-setup

I spent the rest of the two days catching Slice of Pi talks, observing (and occasionally assisting) the CPC workshops.  There were a few of these that stuck with me over those days

The New IT/Computing Curriculum

The long suffering Mrs ForToffee is a Primary teacher of some 12 years experience now which has given me a little bit of an insight (but not much) into her world.  Unfortunately for her the poor woman has become a “geek by osmosis” from the years she has spent with me.  As a result of my interest in the Pi I have been passing her as much information about the new curriculum and the Foundations efforts to assist with it as I can. However, the teachers I met are worried about a lot of the stuff that techies like me take for granted; breadboarding, coding, and ultimately understanding why something has gone wrong.  What I do for a living/fun is daunting to them, but then again I couldn’t teach a class of 30 youngsters every day of the week.  One of the things I did note was an inclination for teachers that wanted to use the GPIO to look at PiFace, PiGlow, (and now PiBrella) and the like as they’re quick and easy to setup and get working.  It also mitigates their fear of bent or shorted pins and Pis that have had the magic smoke released.

I fear there is a LOT of work to be done in education to get both Primary and Secondary school teachers up to speed on computational thinking and coding; using the Pi as a platform or not.  I can foresee teachers and pupils (in some quarters) needing to learn together; or the teachers learning from the pupils as they absorb it at a quicker rate.  Some IT teachers just don’t know how to approach it [Note: this is my opinion based on a small sample of teachers I met at one conference]

Young People are Scarily Good

I work with teenagers on a voluntary basis with Scouts; I’d be hard pushed to find many that were as eloquent or as confident as Amy (14), Matthew (14) and Andrew (17).  All three of them provided well delivered 15 minute talks to an audience of teachers and techies who’s average age would have been at at least twice if not nearly three times their own. [ I hope to add the videos of their talks when they become available]

The Pi Community is Diverse

  • The young (as mentioned above, and younger) to the grey but young at heart keen to learn or keen to pass on their knowledge
  • The techies that make stuff happen for others like Raspbian and GPIOScratch, or that bring skills from other platforms like the Arduino
  • The teachers like Carrie Ann and Alan O’D who are passionate about their subject and want to enthuse everyone they meet (they both usually succeed)
  • Those that know little but want to get involved
  • The rest of us that fit in somewhere on this wide ranging raspberry pi love-in Venn diagram 🙂

I also had the fortune to meet members of the Pi Twitter-ati I’d been reading about from the past few weeks and years.  Of the names I can remember…..

  • Charlotte (who I’d been taunting on Twitter about the cake competition at the after jam party on Friday evening)
  • Micheal (who attempted to fix my Raspberry Pi’s WIFI sat on the floor of the Viglen stand)
  • Les (Knows how to recommend a restaurant)
  • Simon (of ScratchGPIO fame)
  • Alex (RasPi.TV)
  • David (STEM Ambassador)
  • Lisa (party planner extrodinaire, mother to two very clever children)
  • Amy (Older clever child)
  • Dan (Younger clever child
  • Andrew (Surrogate clever child)
  • Alan O’D (Mr Raspberry Jamboree, the master of volunteering people)

After the main conference there was a 2 hour “after show” party,  which I’ll waffle about for a bit in my next post

Cue the Pictures

8×8 Snake v2

A couple of weeks ago the lovely Lisa Mather (party planner extraordinaire) put out a request on Twitter for party games. This was for the Manchester Raspberry Jamboree after party on the 28th February (more on the jam in my next post).

So, having already cobbled the basic Snake game together in December I offered to polish it up a bit and add scoring functionality. In addition I felt it needed a better control interface than the keyboard, so a quick shout out to some local friends and I had a Quickshot II+ from a Spectrum ZX81 – it even has the clicky micro switches that any child of the 80’s instantly recognises – mmmmm, retro.

The core code from my last post hasn’t changed much, the main differences are;

  • swapping keyboard input routine for GPIO pins detection – one for each switch in the joystick (up/down/left/right/fire)
  • implementing code to record scores (1 point for each piece of food) and using two of the 4x seven segment displays from the Delorean Time Circuit for displaying them

Snake Wiring

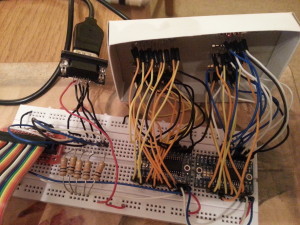
Wiring was a pig (as you can see), but worth it in the end; even if I did have to do some gorilla soldering on Friday when a couple of leads came loose.  I highly recommend buying at least the 8×8 grid as a PCB kit (e.g. Pimoroni or CPC) to save your sanity.  The desoldering of the seven segments and subsequent wiring you see here took me a goodly portion of my Sunday afternoon 🙁

In the picture you can see 5 (extra chunky) resistors on the breadboard.  These are being used to pull the GPIO pins low (or off).  As the joystick is moved, the internal switches will complete the circuit with the +3.3v line (red wires) which will set the attached pin high (or on).  This is detected by the code and the snake moves the chosen direction (if it’s allowed to of course).

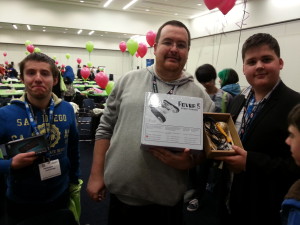
The game had a lot of interest and went down well with young and young at heart. The high score went to both Oliver (who achieved it first) and Michael with a score of 22!

Chris (3rd - 21) Michael  & Oliver (1st - 22)

Chris (3rd – 21) Michael & Oliver (1st – 22)

[updated source to follow]

8×8 Snake

8x8 Snake

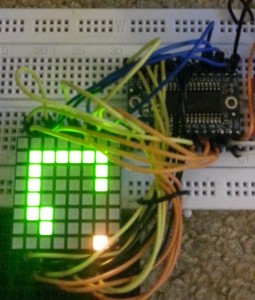
One of the other things the Adafruit LED Backpacks are bundled with is an 8×8 LED matrix.  As I no longer needed my Time Circuit project I removed a backpack from the setup and ordered a Red/Green matrix from CPC.  I purposely bought the bi colour matrix as the red, green and yellow (r+g) gives me scope to play around more.

So what first?  Well, I needed to wire it up; and as I am using the Adafruit Python libraries again I need to make sure the red and green pins were wired according to their code (red = a0 – a7, green = a8 – a15).  To make sure everything was in order I ran the example Python code from the library which cycles through each LED in red, green then yellow.

Let’s Code
In my code there are four main variables

snake – a list object containing the x,y coordinates of each piece of the snake at any one time. These are in head to tail order.

food – contains the x,y coordinates of the current ‘food’ block on the display

direction – a string that holds the direction of travel of our snake r(ight), l(eft), u(p) or d(own)

grid – an instance of the Adafruit 8×8 grid library

The main function then has the following actions:

    • Check for key press; see if we need to change direction
    • Identify the next square the snake will move to
    • Check to see if it’s hit the edge or itself
    • Check to see if we’ve ‘eaten’ the food
    • Update the snake object to move it on one square
    • Draw the snake

To manage the snake the list object is used as a queue or First In First Out, aka FIFO, structure (that’s a proper programming term and everything kids!).  So every move is done in two steps,  insert the new head location into the first position (or push) and remove (or pop) the last item in the queue.  

Before the insert happens the new coordinate is checked to see if we need to do anything special.  

    • If the new head is outside the grid (hit the edge) or is the same location as part of the snake body then the code walks the snake list object and turns each coordinate red.
    • If the snake eats the food then the tail coordinate stays on the queue, extending the body by 1

That’s about it really.  The only other thing to note is that without using PyGame and an interactive screen capturing the keys is not quite as straight forward as you would hope.  There are two functions keyPress and control that I borrowed from the interwebs (there’s stacks of examples) to capture the key presses on a separate thread so that the main display loop (move snake, redraw etc) doesn’t hang waiting for a key press.

Source Code