A while back I saw a project on IndieGoGo by a teenager, Tom Garry. The project was called 7 Seg for Raspberry Pi. Having never backed anything like this I thought I’d give it a try, at £10 it’s not a lot to loose.
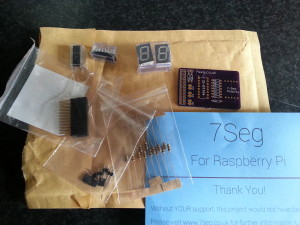
Fast forward about 6 weeks (5th May for those of you who care) and a brown jiffy bag landed on my door mat. I love brown jiffy bags as they usually contain goodies! This one did not disappoint.
So what did I get for my £10
- A well produced purple PCB
- Several bags of components – a nice touch was extra resistors of each value
- Two 7seg displays; one red the other green. This is so you can choose your colour
- A warm fuzzy feeling 🙂
When I eventually got round to soldering it up it was quite straight forward, it is also well documented on the 7seg.co.uk website. Another week later I managed to find some time to test it! Thankfully I managed to solder everything in the right places and it worked first time.
I ran a test python program using the Simple Counter example from the website. I augmented it to count down as well as up by referencing pin 11 of the GPIO which controls the decrement function. In the quick video below I repeated the for loop changing the upPin variable to downPin which references pin 11.
The build and the packaging are great but (sorry Tom, there’s a but), it’s a limited function device; i.e. it can only count from 0 to 9 and back again (unless I’ve missed something?). The device has three jumpers that are closed (i.e. connected) and these relate to the reset count up and count down pins on the GPIO. I suspect this has been done to allow leads to be attached to different pins on the header should the user wish to change the numbering. The one I haven’t figured out yet is the open jumper at the top as I can’t seem to find any tracks leading to/from them. However, I have yet to unpack the multimeter and go a hunting. [UPDATE: Tom pointed me at the schematic here]
If this were to go to a Rev 2 I would like to see the Borrow and Carry function made available from the 40110 chip. This could allow either feedback into the Pi via further GPIO pins or allow the daisy chaining of two or more boards
All in all it’s a tidy little add-on board which looks the part. Top job Tom!

Pingback: Review of 7 Seg for #RaspberryPi | Raspberry PiPod