A new, wireless, PiZero has been heralded in, and with it a set of new kits from Pimoroni. All the kits are things of beauty, as you would expect from the Pirates of Sheffield, but the Scroll Bot caught my eye for two reasons.
- It’s an absolutley awesome looking kit
- I was building a Pi Zero based badge for the 5th Raspberry Pi Birthday
The Scroll Bot kit contains
- 3 layers of acrylic to build the head
- 2 support legs & associated mounts
- All the nylon bolts & nuts you need
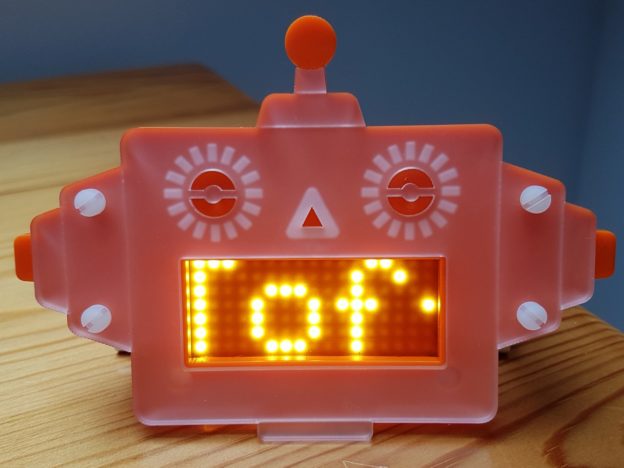
- A Scroll pHAT HD + header (17×7 of very bright LEDs)
- A Pi Zero W, and associated adaptors
- A sturdy reusable hobby box to hold it all
- A beautifully designed set of stickers
I had already started making a badge with the Scroll pHat (11×5 LEDs), but with the Scroll pHAT HD (17×7 LEDs) you get 54% more LEDs… MOAR BLINKEN LIGHTS!!! It was ordered on the day of release (Tuesday) and arrived 2 days later (Thursday), giving me just about enough time to get everything sorted in time (Friday night!).
But just having your name and Twitter handle scrolling across the screen is… well…. not particularly original. I had already decided that I wanted to add a ‘hidden’ game. On the Scroll pHAT I had started a run & jump type game (like the dinosaur game in Chrome), which was great, and I must finish it. However with the extra height and width I started thinking bigger; what about Pong?
To test the theory I knocked up some Python to layout the game board. It looked perfect! With the ability to adjust the brightness of each LED/pixel, it allowed me to draw the line down the middle, or ‘net’ so it was dimmer than the rest of the board. This produced a nice visual effect. Here’s a video of the finished game.
But how to control it?
I didn’t want to mount the buttons on the front as I felt this would ruin the look of the robot face. I could imagine the designer weeping in a corner if I’d done that! Instead I mounted buttons on the back. By not fitting the legs I could get one button on each side; this would allow for two players. Normally you would have a button to move the pong paddle up, and one for down. However, with only a the single button per player the paddle had to be constantly moving in one direction, with the button changing direction. As a result, if the button is pressed the paddle moves up, if it’s released the paddle drops down.
All of this was done while mounted on a Black HAT H4ck3r and a breadboard. Transferring the the buttons to the finished article required a bit of hardware hacking, as it should where a Pi is involved. They were mounted on the rear of the badge with blu tack with wires soldered directly to the underside of the Pi Zero.
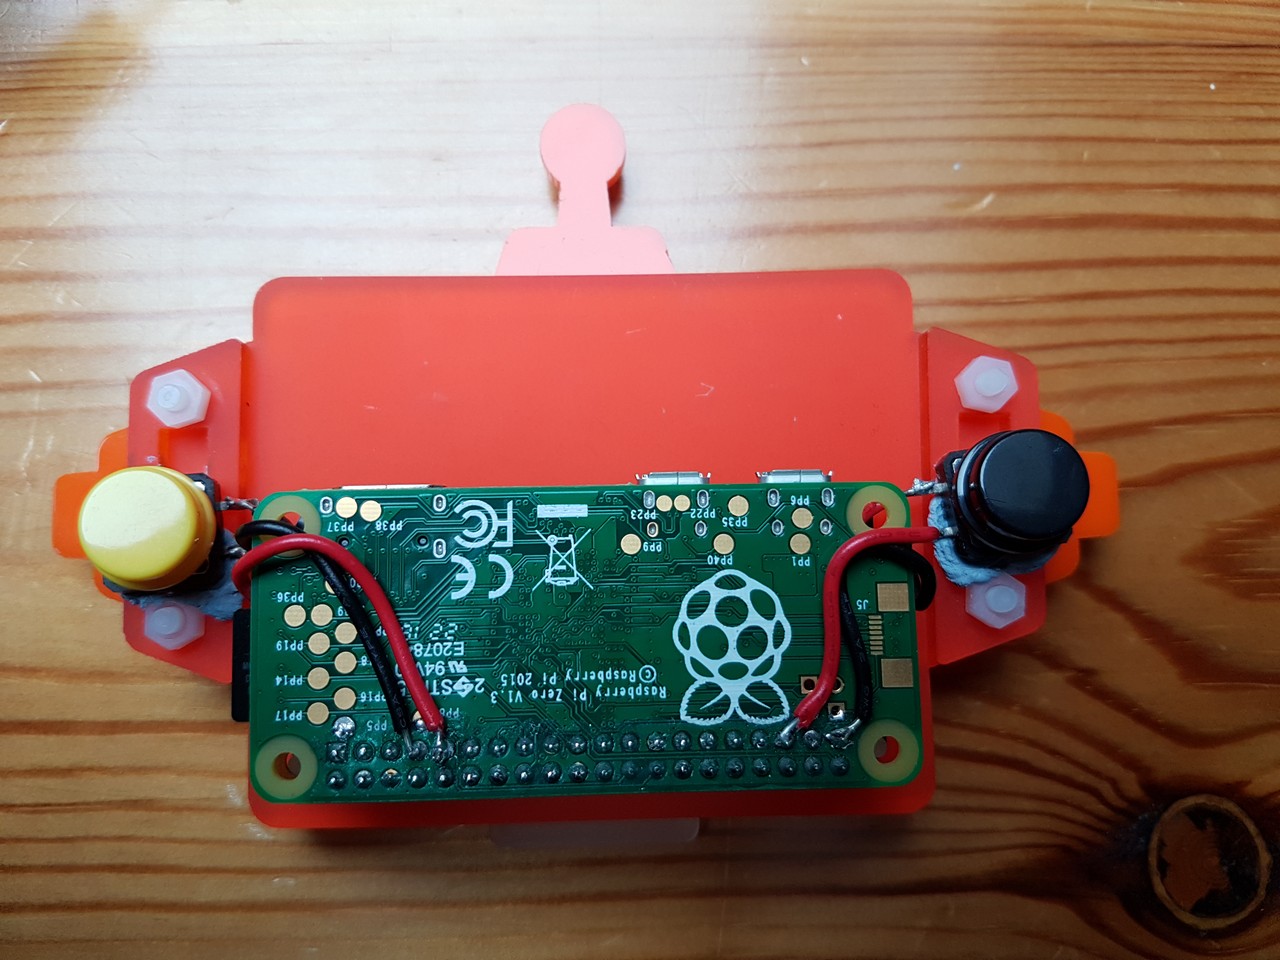
Buttons mounted on the rear of the Scroll Bot
Scoring was kept fairly simple, with one pixel lighting for each point across the top. The game was coded as a first to 5 points. When the game ended the winning side had a smiley face, the loser a sad face.
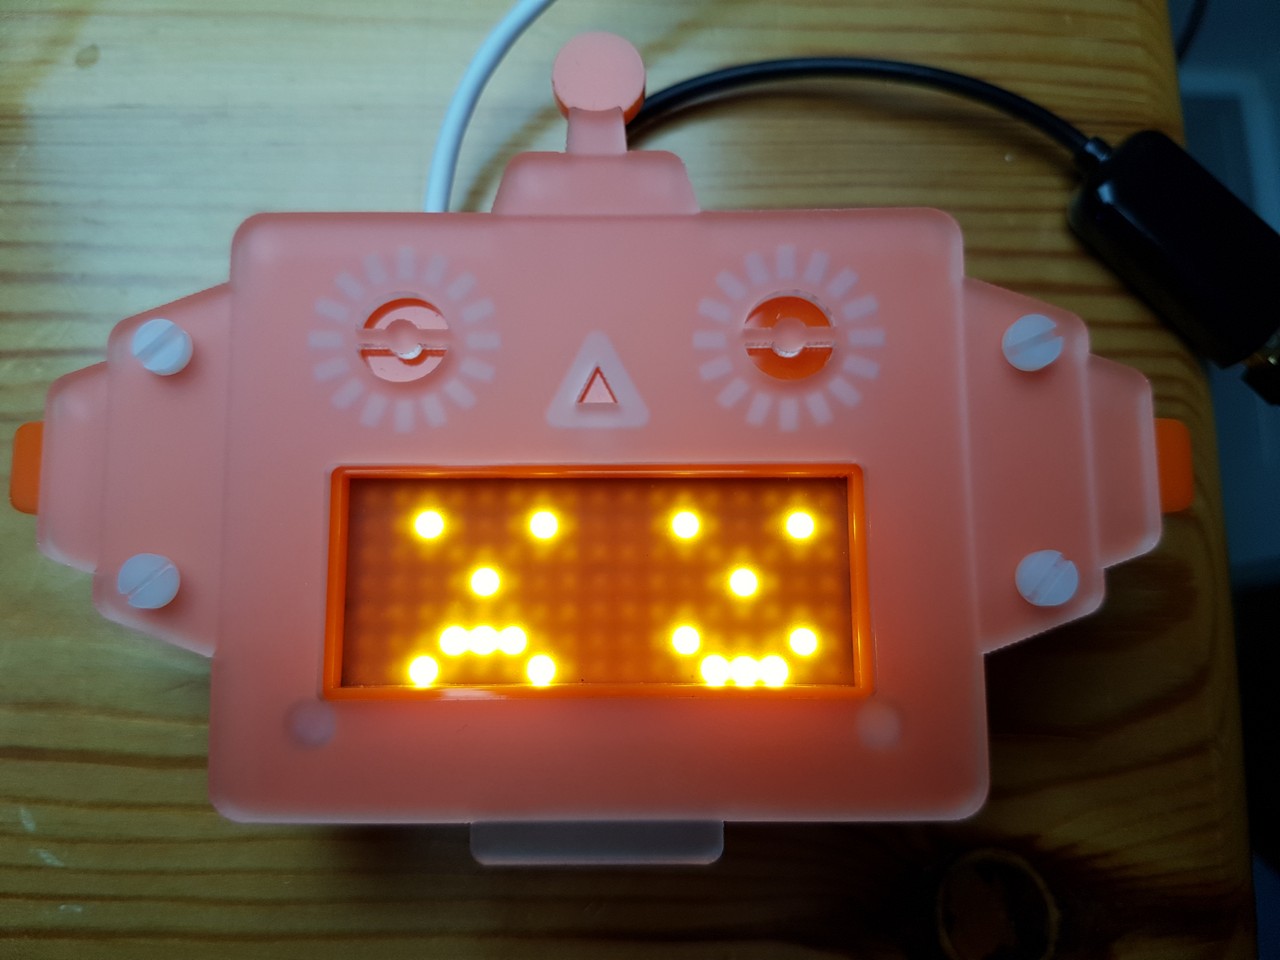
Win / Lose indicator
Power
Keeping this portable was the key. I could run it from a long cable and a battery pack in my pocket, but that would be cumbersome. Luckily I had a 1000mAh LiPo and a ZeroLiPo shim and added that to the build. The shim was put on the header pins, soldered in place, then the Scroll pHAT HD mounted on the header as normal. The 1000mAh LiPo was good for about 4hrs, after which I had to resort to a cumbersome battery pack 😀

Conclusion
Over the weekend the badge went down really well and had lots of interest. I even had two lads come up to me and ask me how it all worked as they wanted to make one for their Computing teacher as a present when they left in the summer. That must be one cool teacher!
Even Paul from Pimoroni had a play
This is @ForToffee and @guru playing pong on @ForToffee's excellently modified Scroll Bot #PiParty pic.twitter.com/EFYACdiCrh
— pimoroni (@pimoroni) March 4, 2017
The source is available on Github – https://github.com/ForToffee/Scroll-Bot-Badge – it might not be pretty, but it works.
Pingback: Fun and a hidden game with the ScrollBot from Pimoroni and a Raspberry Pi Zero W – Raspberry Pi Pod