OK, so not quite the Sheldon Virtual Presence Device from Big Bang Theory but who knows…. maybe my next version?
I have had various bits of robots floating around for a while now and never actually pulled them all together. I’ve made both a Scratch, and a PS3 controlled, Pibrella powered bot which I must blog about one of these days. I also built one from LEGO motors and a SN754410 H-bridge a year or two back, but the motors were old (20+ years) and it didn’t get far.
Hardware
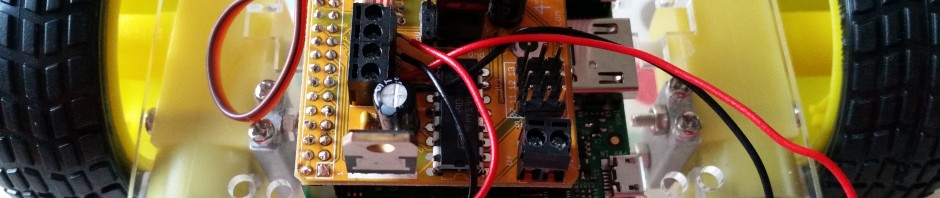
4tronix MicRoCon – It’s an all in one platform that provides power conversion from 6-9v down to 5v to so it can power the Pi as well as an H-bridge to drive the motors. The other feature I will make use of is some 5v connectors for servos. Mine is the v1.1 from early 2014, v3 is the current version hence the change in looks.
AdaFruit Pan and Tilt – This I picked up from Pimoroni. It’s a 2 servo device that has a base plate to mount items on like a……
Raspberry Pi Camera – If you don’t know what this is; it’s a webcam that plugs directly into the Pi, not via USB. Loads of places stock these
Car/Bot Chassis – Mine is one of these from EBay.
WiFi – Yes, you could do this wired, but that would be very limiting!
Software
Flask– A Python based light weight web framework. It’s relatively straight forward to use and allows us to control the GPIO directly.
RPIO – For this project I have moved away from the commonly used RPi.GPIO library as the servo control is less “jittery”. The RPIO library uses C to better manage the precise timings needed. Ultimately driving the servos via an Arduino or similar would provide the best results, but that was more complicated than I wanted to go.
The Build
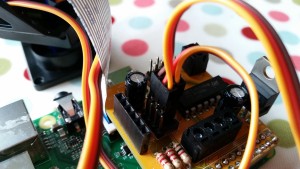 The two servos are attached to the MicRoCon board via the 3 pin headers
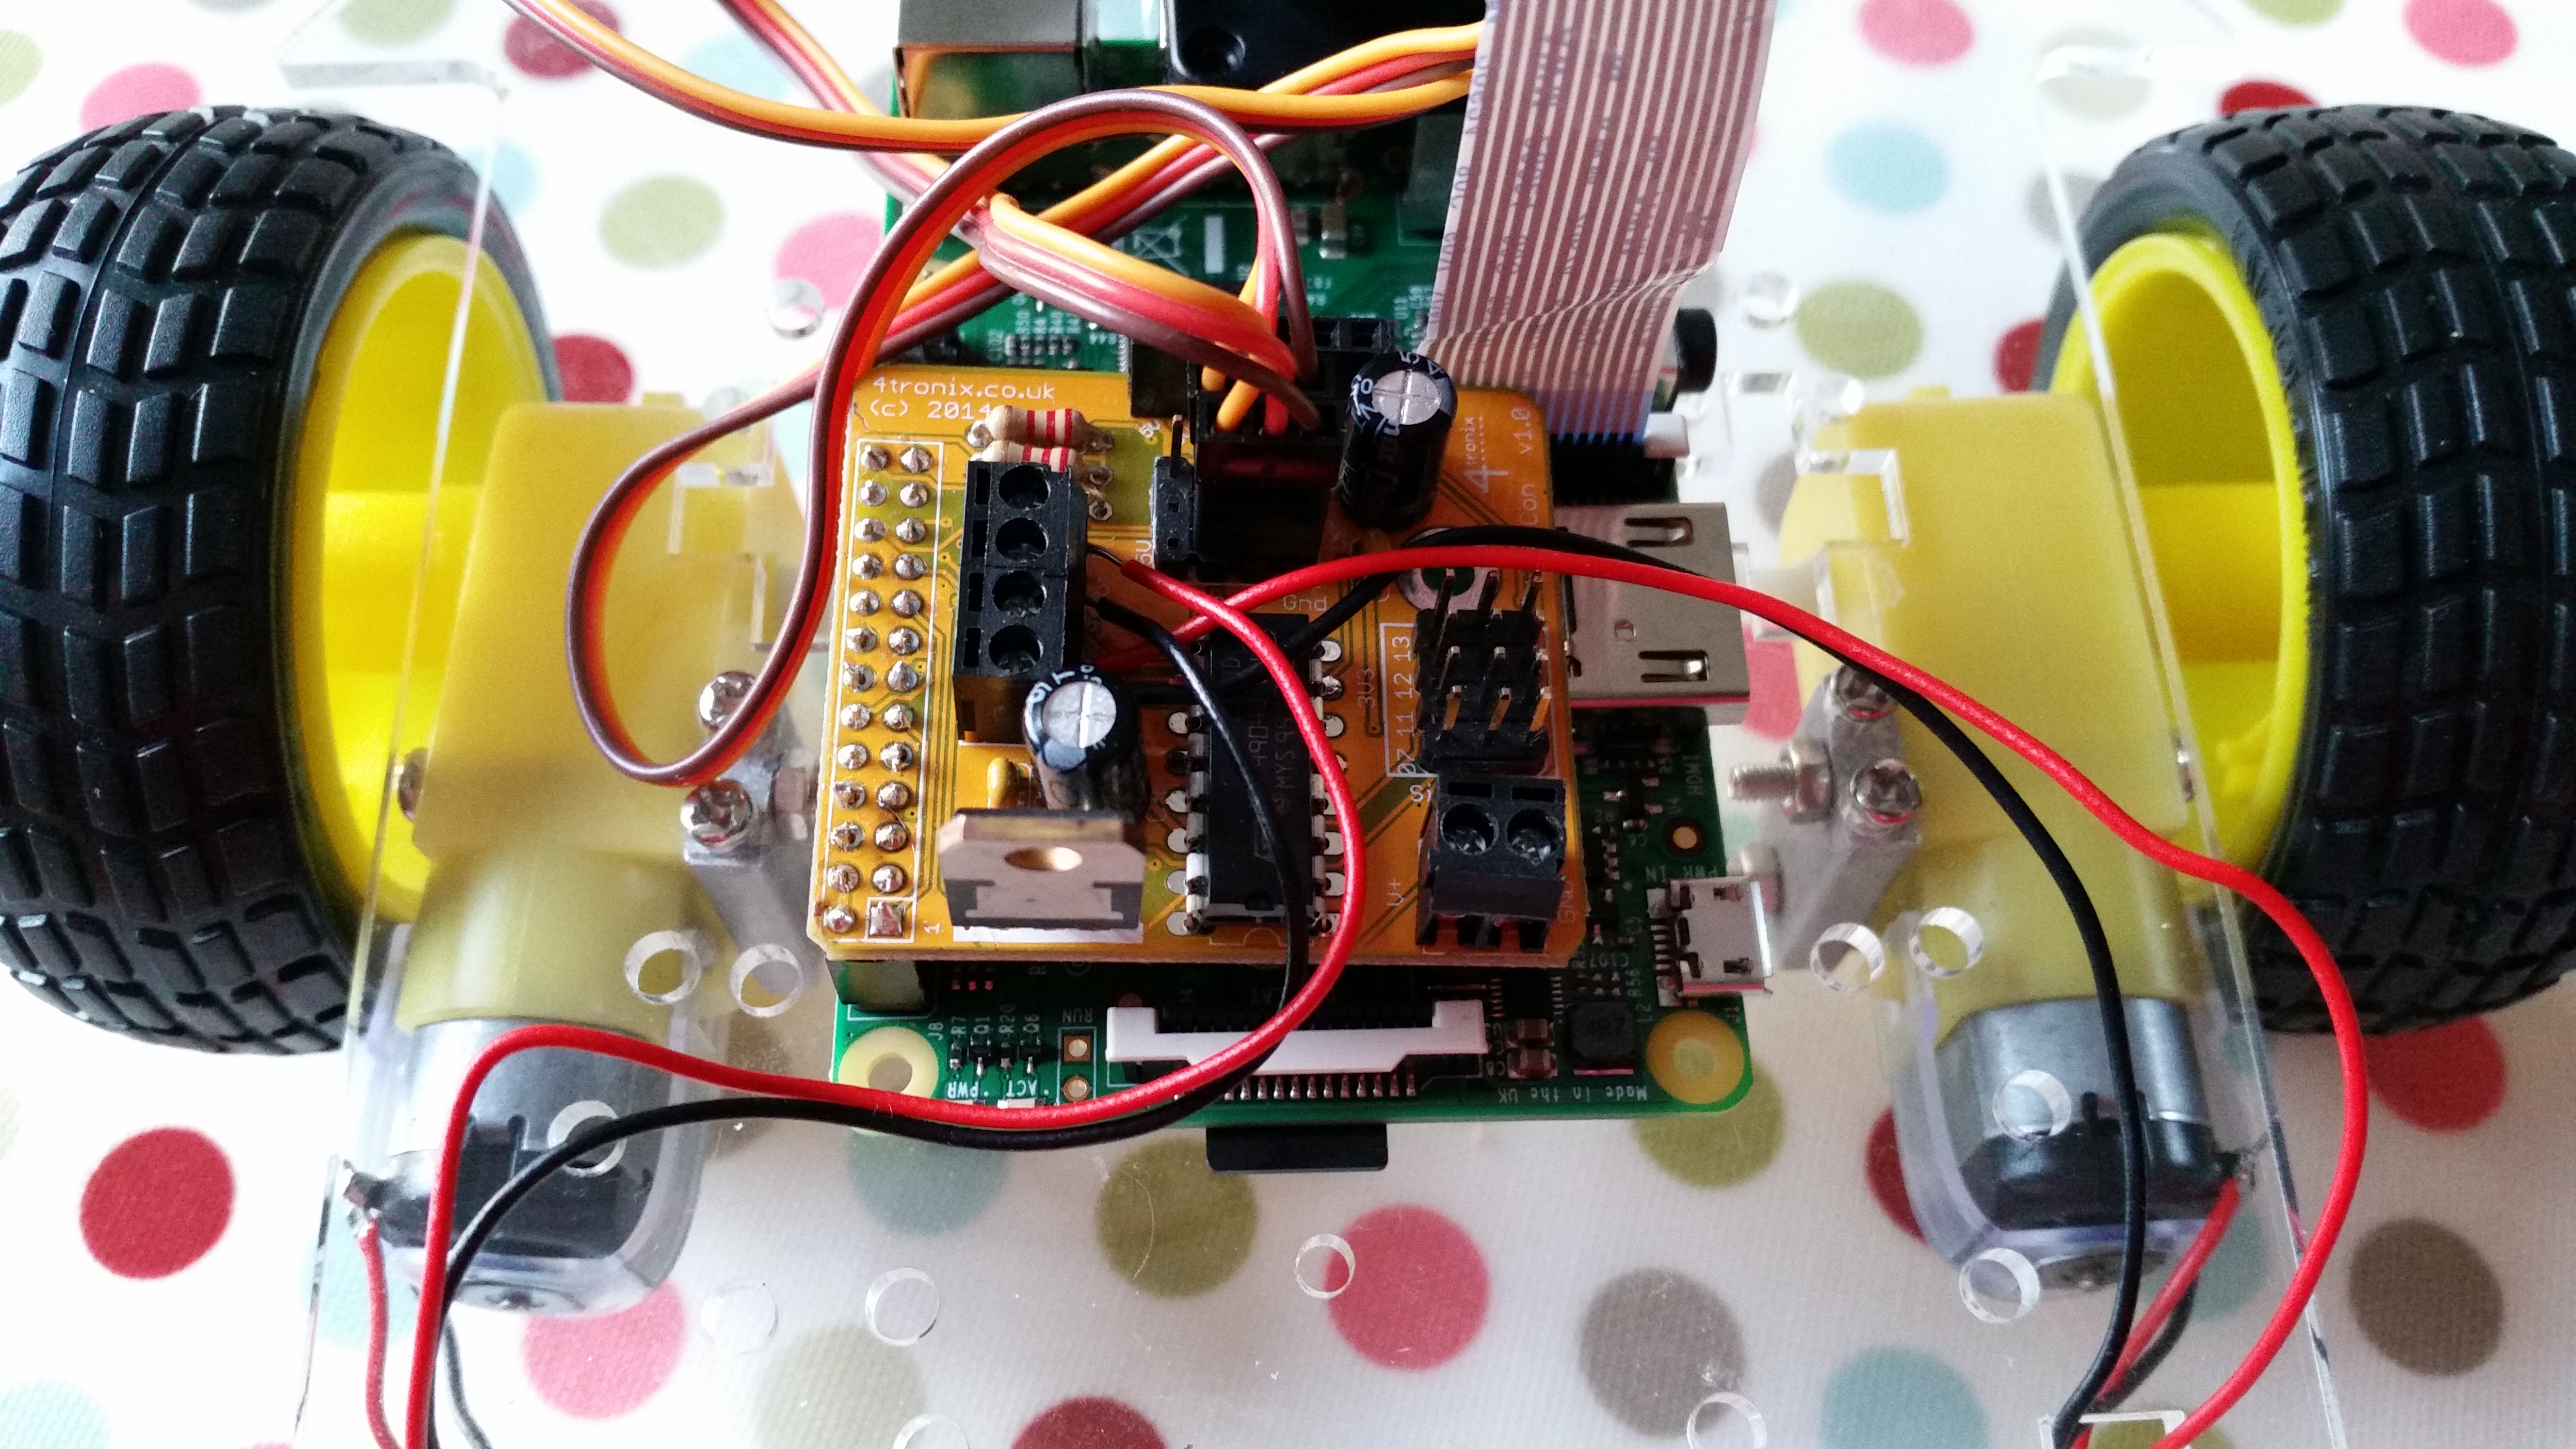
The motors are wired into this 4-way screw terminal
 The battery pack is wired into this 2-way screw terminal
Then, using a liberal amount of blu-tak, tape and will power it’s all fixed to the chassis
The Code
My code is derived/inspired by this and this, and adapted for my needs. My source can be found on GitHub. I’ll quickly go through the key components to give some context.
servo.py – as the name suggests, this is a class to control a servo. When an instance of the class is created it takes the BCM pin number the servo is connected to. Once created, the instance has two methods
- setAngle(degrees) – set the angle of the servo between -90 and +90
- incAngle(increment) – specify the number of degrees to move the servo (+ or -)
Why BCM numbers? Mainly because they are default for RPIO
motor.py – This is a still “in progress” as I would like to add speed control via PWM (Pulse Width Modulation – i.e. turn the motor on and off quickly to reduce the rotation speed). However, for my initial needs it serves its purpose. On creation this class take two parameters; these are the two BCM pin numbers that control the motor direction on the H-bridge chip (i.e. forward and back).
- start(direction, speed, duration) – activates the motor.
- direction can be F[orward] or B[ackwards]
- speed (not used yet) will control how fast the motor goes
- duration denotes the number of seconds to run for . If duration is 0 (zero) then the motor is on until stop() is called
- stop() – stops all motor activity
camera_pi.py – Taken directly from here. It provides a streaming interface from the Pi camera module
templates/index.html – Flask uses a templates folder to manage the HTML pages it displays. This is the only page and provides the buttons to control the motors and an area to display the camera feed.
app.py – this is the brains of the outfit and acts as our web server. The camera, servo, and motor control are all done from here. The key functions of interest are
- video_feed() – This is called by the HTML to request a new image to display from the camera. The function gen() calls the Camera class from camera_pi.py and requests a new image
- move(direction) – this function takes the commands generated by the buttons on the web page and acts on the request to move servos or turn motors.
It Lives!
The video quality is not great, but you get the idea.
Lesson Learned
More of an aide–mémoire in case I stumble over these again, or warnings for the weary traveller.
We need more power! – The 4xAA batteries I had were fine running the wifi, camera and servos. When the motors were added the wifi connection would drop or the Pi would reset due to low voltage/current. There are two ways to solve this – more batteries (up to 9v on this board), or powering the Pi direct. I chose the latter option as I had a small(ish) 5.2Ah phone charging battery to hand. The upside is if the motor batteries fail the Pi doesn’t go with it, plus my portable battery has a charge indicator on it so I could see if the Pi is about to expire. I will try an 9v at some point as it will be far more compact.
Threading – No, we’re not talking sewing or wearable tech here. Threading allows two or more actions in a program to occur at the same time. The video feed is constantly updating, when a button is pressed this is a second action but it is blocked because the web page is still updating the image. Enabling threading in Flask allowed both actions to take place without conflicting with each other. This does carry some risks, and there are various dire warnings on the Internet about using it in production code. However this is for one or two users in a local environment. I think we’re safe!
To-Do
Like all good hacking projects there’s still stuff to do.
- Speed in the motor control
- Catch exceptions in the video feed to stop the server crashing
- ‘Touch’ friendly, i.e. keep moving servo/motor while button pressed, stop when let go
Pingback: Raspberry Pi robot with streaming video and a web remote control | Raspberry Pi Pod
Pingback: Raspberry Pi Robot With Streaming Video And a Web Remote Control #piday #raspberrypi @Raspberry_Pi « adafruit industries blog
hhii…its a great project, can i have the step by step process of the software part?? or how can i implement the codes which uploaded in github.?? plz explain 🙂
Hi Dunnoor,
You’ll need to install Flask (see the readme in Github) then run app.py. Once up and running connect to your Pi with a web browser and (hopefully) go from there.
Cheers
thankss 🙂
hey sorry to distrb you again. but i want to know what is rpio ? is a hardware or software?
and its not installing in my raspberry pi 2 ,plz help
Dunnoor,
Please look at the Readme in the GitHub repository, it’s there for a reason 🙂Actually, that’s in the MeArm repository (check there)
Alternatively you could have had a quick search for RPIO…..
Would love to see what you’re building, are you blogging/vlogging your adventures?
RPIO Is not wrkng on my pi2 ..so is there any other ways to do it with tha same code as u gave?
not yet blogging.but soon i wil 🙂
Have a look at my MeArm article/code. Try using the ServoBlaster library and code.
initially i jst want to try the motors first. in your code u use rpio at motor.py . also.. at that point what shud i do?
If you just want to use the motors then you can remove RPIO and probably replace with RPi.GPIO or GPIO Zero, but that will break other bits.
Read and understand the code, that’s the “fun” of it. Take it apart and put it back together to do what you want it to do. I assume you have the MicroCon addon board? If not you are probably starting from the wrong place.
heyy dear ,how r u?? i need ur hlp,when im tring to run app.py ,i got these error ..can u tell me y?
File “motor.py”, line 1, in
import RPIO
File “/usr/local/lib/python2.7/dist-packages/RPIO-0.10.1-py2.7-linux-armv7l.egg/RPIO/__init__.py”, line 115, in
import RPIO._GPIO as _GPIO
SystemError: This module can only be run on a Raspberry Pi!
Dunnoor,
The clue is in the last line; you’re not using a Raspberry Pi.
This blog is primarily about my projects on a Raspberry Pi, the blog post is about a Raspberry Pi based robot, the RPI of RPIO stands for Raspberry Pi.
but im using raspberry pi 2 . 🙁
Have you checked the RPIO webpages, does it support RPi2?
I’m not in a position to test it out myself, you’re going to have to figure this out yourself.
hey iv figrd it out,,,um using rpi.gpio as io instead of rpio ..but i v figure out another problem 😀 . and that is if i stop running the program the camera module dosnt stop yet..the red light of cam dosnt off. what shud i do ??
Investigate and learn, that is the best advice I can give you.
i m working on raspberry pi 3 and i want to control my bot through web page… i have followed this procedure and installed flask video steaming its working properly and on raspbian i have run the app.py file its working but problem is i m doing it wired connection to raspberry pi 3…can i get the solution how to do it wireless…..should i have to install the vlc or vnc viewer..?
Hey there,
Check https://www.raspberrypi.org/documentation/configuration/wireless/ on how to setup wireless on a RPi. If you are running headless, as your comment suggests, the refer to the command line instructions at the end of that page.
Thanks
File “app.py” ,line in
MototA = motor.Motorcontroller(8,7)
Attribute error : module object has no attribute Motorcontroller…
What to do..???
Ankita,
Hi there, you appear to be reusing some of my code, I would love to see what you’re building!
If you look in the motor.py module you will see that it is MotorController. Python is a case sensitive language.
Cheers
ForToffee
ForToffee,
How are you connecting via WiFi? Is your RPI an access point? Are you connecting via WiFi router?
I would like to connect point to point, using a phone or tablet like a RC controller. I don’t want to depend on having third piece to connect through. I am just not sure how to do this part.
Thank you
Mark
Hi Mark,
I do this one of two ways; via my local Wifi, or by turning my phone into a mobile hotspot (Android) and the Pi connects to that.
If you want to go down the route of turning your Pi into an AP there are loads of guides for this, but I’ve never needed to do that so cannot really advise.
Cheers
HI Toffee,
I was wondering if there was a way to increase the fps of the video feed. Currently it lags behind about a second or so.
Thanks,
Jason
As I mentioned in the blog I borrowed that code from others. Sorry I can’t help much further