What is it?
The MeArm has been developed by Ben Gray (aka @phenoptix) and is a laser cut, build it yourself, robotic arm controlled by 4 servos. Once built, just add a controller of some description (micro controller/Arduino, Pi, Beaglebone Black, etc) and drive the servos to move the arm around. You can find out more from Indestructibles article. Mine was purchased from 4tronix.

Me MeArm
The Build
By and large there are no real problems building it, so long as you take it slow and steady. I think it took me between two and three hours one evening to put it all together. The instructions were pretty clear and concise, some parts needed a couple of attempts to put together as there is a small angle on the screw holes meaning that the screws/bolts only go in one way. The screws are stiff as they bind/thread into the plastic so while it takes some effort, too much could result in tears! To that end there are a couple of spare servo collars in the kit, which (thankfully) I didn’t have to use. The only bit I would say was difficult was getting the main arm attached to the “hip” servo. This is one of the last steps and there ends up with a lot of parts getting in the way.
My initial concern is the strength of the “hip” joint as the entire weight of the arm, and anything it’s holding, is supported by a servo and a screw. Some sort of collar round the servo at base of the arm might help. But it would need to support the weight while allowing fluid movement.
I moved all the joints by hand and was happy that it was all working as expected
Initial Operation
At this point I wanted to test my construction skills, and not worry too much about the finesse of the control method. My last project was the ToffeeBot, which has a dual servo pan and tilt mechanism on it, so I started with that – why reinvent the wheel!
As a result I ended up with a web control panel built on Flask – i.e. a copy/paste of the pan/tilt code for four servos instead of two 😀
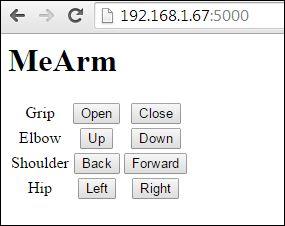
Flask web interface
The main snag I hit when trying to operate the MeArm was over tightened joints. While I could move them by hand the servos just wouldn’t budge. To begin with I thought I had a code issue and the servos were not responding. With a bit… OK, a lot of trial and error the joints moved easily and the servos behaved as expected. The lesson here is to only tighten as needed!
I also had to fiddle around with the gripper so I could find the closed position accurately. To do this I needed to set the servo to the maximum (180 deg) position, unscrew and move the gripper closed, re-screw and test. I ended up setting it to around the 165-170 mark so that when the gripper closed it was tight.
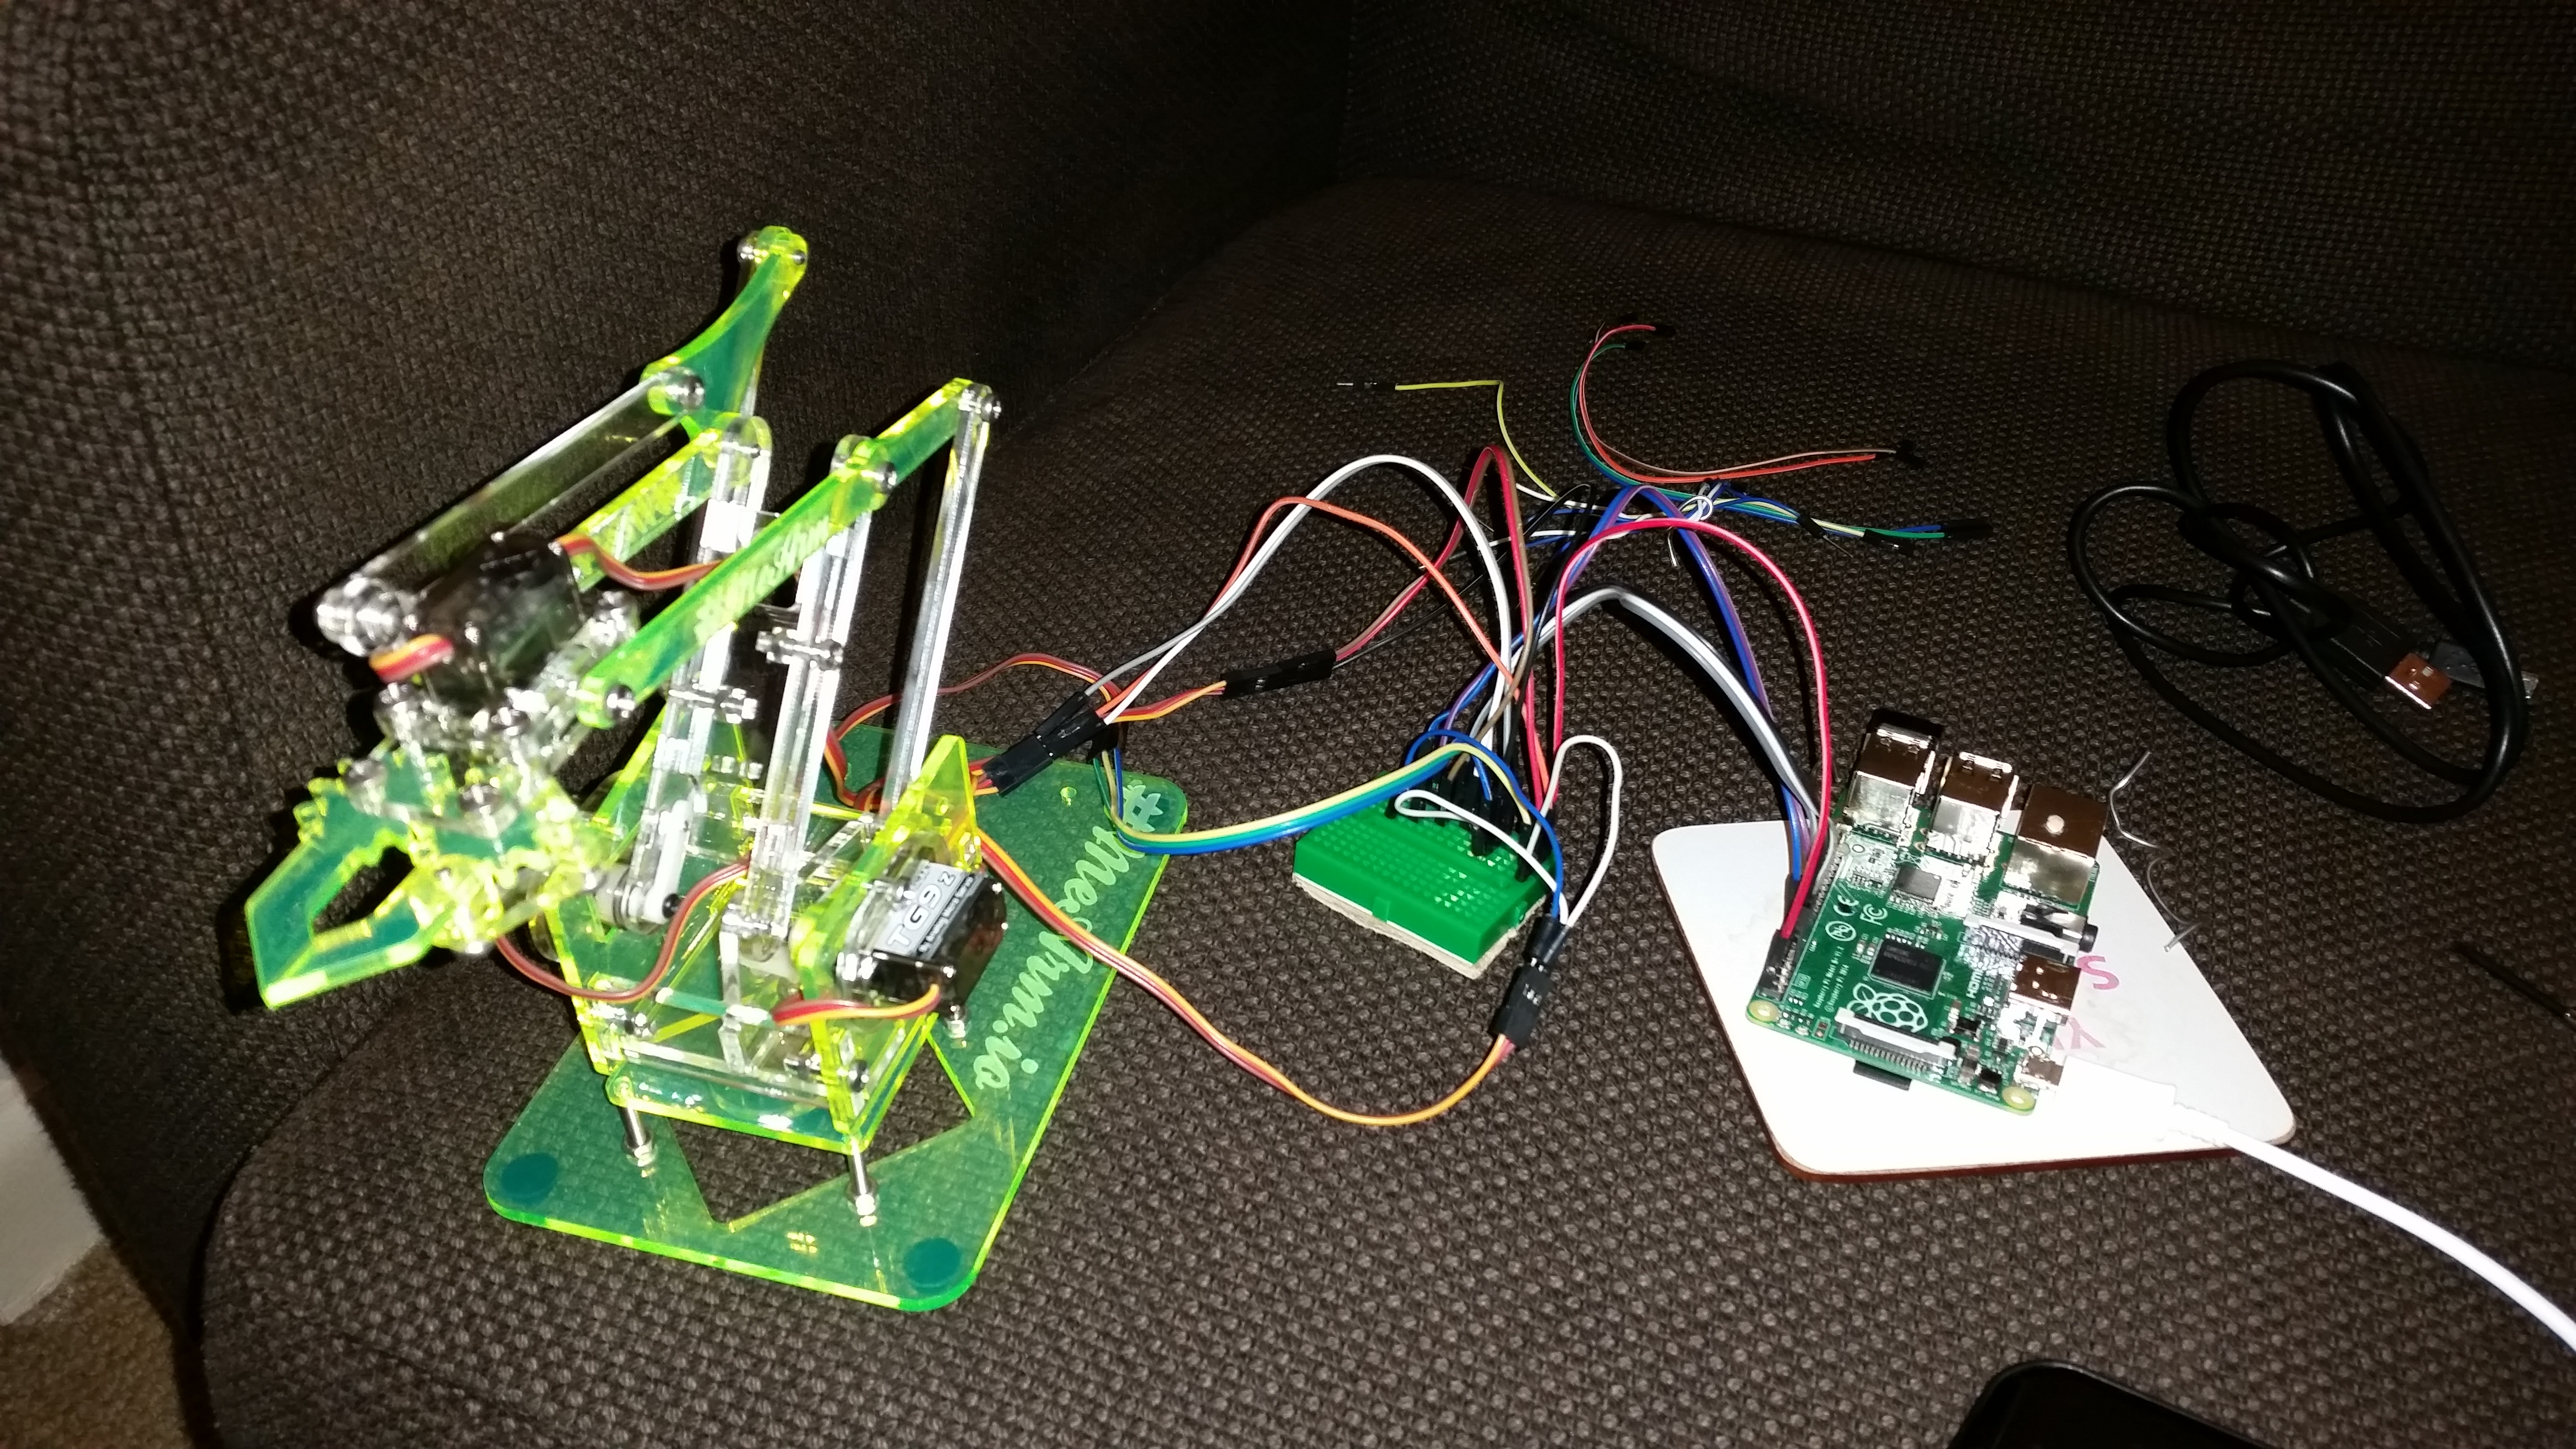
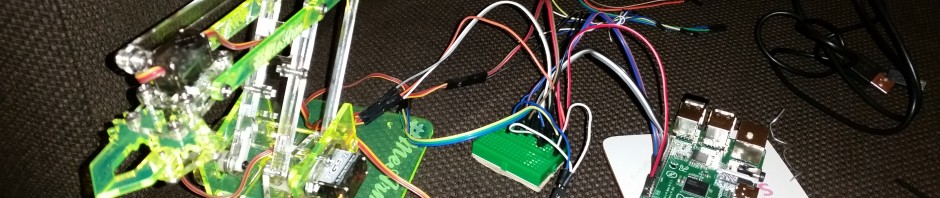
Me Arm servos wired directly to Pi GPIO (breadboard used for power distribution only)
Taking Control
With the hardware testing complete and a few lessons learnt I wanted to move away from the web interface and make use of a PS3 controller. There are LOADS of examples of using the PS3 controller as a joystick in PyGame. The nice thing is, so long as it’s connected via USB, it just works™. In the past, I have got the controller working via bluetooth, again there are many guides for this (try the Raspbians guide) and I recommend you use a USB hub as plugging/unplugging on an original B caused it to reboot and a lot of frustration on my part.
It was at this point that the RPIO.GPIO library began to show its limitations. The code to detect the joystick movement and button actions runs in a while loop. this started interfering with the servo timings causing the arm to move around. Servos work by a pulse occurring at a certain frequency which requires very precise timings. The Pi is not very good at doing this when it has other things to think about, this caused the timings to be off, and hence the jitter.
Enter ServoBlaster (via here)- this I had been aware of for some while and had been suggested as a more effective alternative to RPIO. It’s advantage is that it operates at a lower level in the operating system, and runs as a separate process. With ServoBlaster compiled and installed everything went back to working as expected.
The controls are
- Left Stick (up/down) = “Shoulder”
- Right Stick (up/down) = “Elbow”
- Right Stick (left/right) = “Hip”
- Triangle = Gripper close
- X = Gripper open
- Start = Reset to start point
- Select = Exit
which you can hopefully see demonstrated here
Mostly (h)Armless
The code for all this can be found on my GitHub
I’ve enjoyed playing with this and have a few things I can do with it. One thing I hope to do in the near future is to position the arm by a set of 3D co-ordinates. I’ll have to brush up on angles in a triangle from my GCSE maths for that one!
This project will be with me at the Southend Raspberry Jam on 21st Feb – come along and have a go yourself.
Pingback: Using the MeArm with the Raspberry Pi | Raspberry Pi Pod
Hello there. Are you powering the servos straight from the RPis 5v GPIO pin? (I think you are. That small green breadboard is just connecting wires to wires, right?)
Thanks
Mike
Mike,
Correct! The signal is only one way so the 5v doesn’t come down the wire to the GPIO and the servos are happy taking a 3.3v signal. Of course, much more than 4 and you’ll start getting power issues but there’s no reason you couldn’t run the servos from a secondary power supply to help with that. However, you you were going down that line then probably a dedicated servo driver board would work out better 🙂
Cheers
ForToffee
When you say much more than 4 do you mean 4 volts or the servos on the arm? I really want to buy one but want to know if it will run directly off of the raspberry pi GPIO pins!
4 servos – it’s very much a case of your mileage may vary. I found the B+ (and probably A+/Pi2) more power efficient and so could handle the load better.
Ultimately an Arduino/Servo controller board (like the one from Adafruit) will give you better control. An external power supply of 6v with a couple of amps would run them better.
Other sites have mentioned the servos that come with the MeArm would draw up to 1A each which could damage the Raspberry Pi. Is this not the case then?
In what ways would an Arduino board give you more control over the servos?
Jim,
With regards the servos drawing up to 1A; I have never experienced this (yet) and I suspect this is only under very heavy load (i.e. holding the servo arm so it can’t move, thus forcing the motor to work harder). Also the maker of the MeArm has referenced this article on their site, so I presume they’re not that worried either.
The method I used for this article did not give perfect timings for the servo signals. This resulted in a ‘jitter’ on the servos that caused them to move by a fraction of a degree. The root cause is due to the Pi not having a precise timing mechanism due to lack of an internal clock. Microcontrollers do not suffer from this, hence an Arduino giving better control. Also a dedicated board like a ServoHAT or something like the PiConZero from 4tronix (which uses an ATMega microcontroller) would work.
That all said, this article is from quite a while ago and I believe there are now improved GPIO functions available in some of the libraries. PiGPIO may be worth a look, as it employs a more hardware centric approach to the signal timing. I have also used ServoBlaster in the past with improved results.
I hope all that helps, and thanks for stopping by
Pingback: MeArm part 2 | Dictator Dad's Words of Wisdom
Carl,
I have been experimenting with the MeArm and a Raspberry Pi. I have managed to get the servos working by using the information on the MeArm site and when I type the following they work (I tested all servos):
pi@raspberry ~/PiBits/ServoBlaster/user $ echo 0=50% > /dev/servoblaster
But I have got stuck when trying to go further. I am new to the Raspberry Pi and Python so it is probably something very simple that I’m doing wrong. Anyway, I have followed all your steps above, cloned your GitHub installed Flask, rpio and servoblaster. I then type the following into terminal to run your arm.py:
pi@raspberry ~MeArm $ sudo python arm.py
It then thinks about it but eventually says this:
RuntimeError: rpio.pwm: Page 0 not present (pfn 0 xal0000000000eabs6)
and I have no idea what this means. Please help.
Thank you for your time on this.
I’m using a PMW/Servo hat for the raspberry Pi, however I’m unsure on what to do. I’ve set up my Pi using “https://learn.adafruit.com/adafruit-16-channel-pwm-servo-hat-for-raspberry-pi/attach-and-test-the-hat” however mine doesn’t produce the same outcome and I don’t know why. Any help would be good thanks. (I’m using a Raspberry Pi B+).
Megan,
I don’t have the HAT you mention so I can’t give you specific advice. Your best chance is to work through the adafruit article and make sure you can get a servo to move. If that is unsuccessful check and recheck you’ve completed all the steps (their articles are usually very good). You don’t say what is not working, so some more detail there may shed some light.
Cheers